Finished the weekend artist series #1-01 painting in watercolor. I still call this progression 1/2 since I still want to do additional tweaking via Photoshop. I consider this as a quite crude effort at watercolor =b. I still need more practice to return to my old style(I mean working faster and creating smoother strokes) mixed in with my new style which I am still trying to figure out what exactly.
For this first watercolor post I used multiple colors to make it more whimsical(because of the subject). I also ended up revising my initial thumbnail sketch in the painting process.
*note:This is not an instructional process. I merely am sharing my painting process and in no way am a I saying Im an expert on this.
I used Montval Torchon by Canson paper in 270 g. 9 1/4" x 12 1/2" for this painting. Its paper is grainy with "snowy" surface. I bought it at a local bookstore a long-time ago so I forgot how much it costs.
I wasn't able to take a picture of the brushes I used but I used 3 brush sizes for this. A size 0, size 2 sable Nakamura tokyo brushes and size 6 Prang brush for the washes(the one that comes with the pans).
I used my ever reliable Prang Watercolor. I have been using Prang since I started painting from the and am planning to try a new more expensive brand for my more special paintings(still haven't bought one though still trying to convince my wallet it's really worth it!)
I did not stretch or tone the paper I used before painting.. though I did set out preparing the materials. Well I thought the paper was hard enough to absorb the watercolor. I was wrong it did a bit of warping. So I guess if you plan to use the same paper you should stretch or tone the paper first. I still have enough of this paper for 8-10 paintings so I plan to stretce them all.
Stretching and toning is important to ensure that the paper stays flat when you are painting.
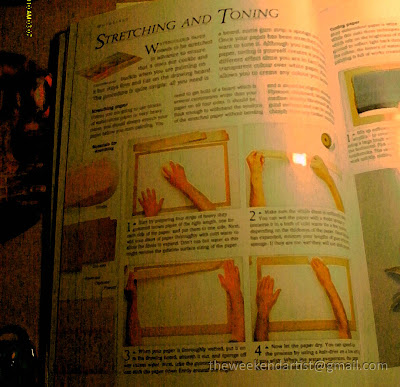
I bought this book AN INTRODUCTION TO WATERCOLOUR which also explains the whole stretching and toning process.
It costs around US$2.50 quite a cheap find for me. Its sold at our local bookstore(National Bookstore).
I'll run through the stretching and toning process a bit...
You need the ff for stretching:
sponge(I use make-up sponge but the bigger sponges are better)
gum strip(I bought mine from National Bookstore)
plywood or chip board(I use old plywoods but am planning to buy a big fibreboard/clipboard from Saizen the japanese store which costs around US 2.00 or less)
1. Prepare the gum strips. Wet your sheet thoroughly with cold water to allow fibres to expand.
2. Make sure whole sheet is uniformly damp using your moist sponge. Once the paper is damp , moisten your gum strips lightly.
3. With wetted gum strip paper mount your paper on your drawing board/plywood with the gum strips on all 4 sides.
4. Let the paper dry and speed it up by using a hair dryer(I am quite impatient so I almost always use a hairdryer)
for toning paper:
you do the same process except you use diluted acrylic paint(with color of your choice) and instead of sponge use a thick wash brush
I actually didn't do a comprehensive sketch for this one I merely painted by whim. I did do another step though that I want to share. I almost always do a draft of where I want to place the elements of my painting on tracing paper. It helps me plan where I want to place the elements of my painting and move it around my canvass. Once I have finalized it I trace it on the back and retrace it on the canvass where I want to place the element. I sometimes even use multiple tracing papers to achieve my desired composition.
This technique can also be used by people who are not very confident with their sketching skills to get their proportions right by merely tracing an image they took from a photo or elsewhere.
I still think doing a comprehensive sketch is the best technique.
The next step which I skipped for this painting is making a gradient test of your mixed colors/washes. I usually do a gradiation of washes on the same paper which i refer to during the painting process. But since I used multiple colors I skipped this one.
This is the halfway finished painting. I replaced some of the stars with papercranes to give a more whimsical approach.
Another technique I use during painting is not going through the usual route of building with the palest wash then going darker. I usually start with the darkest then go back to the palest. I almost always leave the palest part blank(paper color). So for this painting I started with the eyes.
The eyes I think is the most important when painting faces. If you get the eyes right it almost always looks realistic and looks like the person so I put all my best efforts for the eyes.
That wraps up the whole process. Am still thinking of tweaking the cheeks a bit though coz I want him plumper to show a younger age. I might use a watercolor varnish to protect the painting before I send it out.
-the weekend artist-


1 comments:
i never dabbled in a lingering manner on using watercolor when i was back in art school. there were projects once or twice that needed it but i just did not find it suited for me that's why it's interesting for me to know about stretching here. i will want to start using the medium soon but not yet. at least for now, i knew about stretching here. i guess it also works for acrylic, right? coz it's what i preferred using way back when.
Post a Comment